Overview
This guide will show how to add SSL Certificate issued by the Certificate Authority.
CSR Files
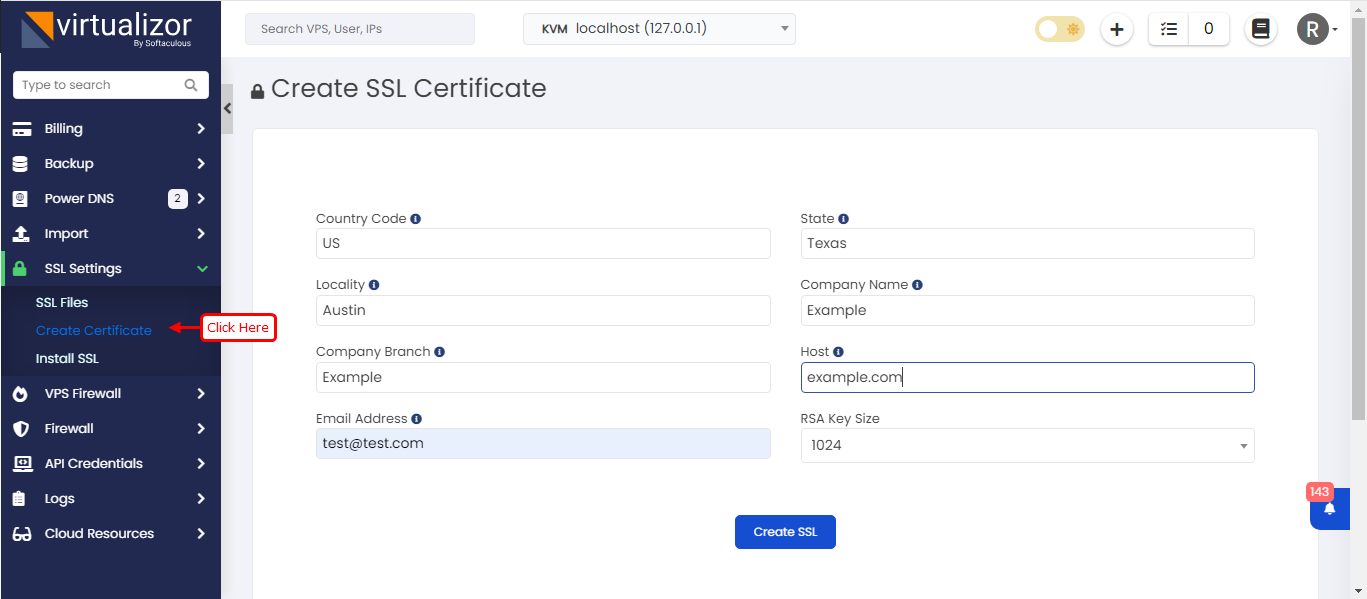
Before we add the certificate, we need to create the key and csr file.
To create the files go to Virtualizor Admin Panel -> SSL Settings -> CSR File.
Fill out your valid details and click on Create SSL.

SSL Files
Once, you have completed with the above steps, Go to SSL Setting -> SSL Files. You will find that virtualizor.key and virtualizor.csr files have been created. You now need to provide these two files to your Certificate Provider for SSL Certificate generation.
Add SSL Certificate
You will require the below three files from the CA Bundle from the provider .
- virtualizor.key - RSA private key generated (required)
- virtualizor.crt - CRT key generated (required)
- virtualizor-bundle -The Certificate Bundle issued by the Certificate Authority (Optional)
- virtualizor.csr - Certificate Signing Request. This is required to obtain an SSL certificate (Optional).
1) Go to "SSL Settings -> SSL files" from Virtualizor Admin panel.
2) Just copy all the Content as it is from the files you have received from the Certificate Authority(Certificate Bundle). Make sure there is no changes in file content you have copied otherwise it will fail to install.
3) After adding the required filed just click on Save.
4) SSL Files will be saved, But you will need to restart the Virtualizor Service from cli "service virtualizor restart" to take effect.
Note : Make sure the .key and .crt file match otherwise there will be an error in adding the certificate .
