Overview
This page explains how to configure PowerDNS for Virtualizor. This guide will also help you to assign the PowerDNS plan to a user, so they can configure the domain records in Virtualizor Enduser Panel.
Requirements
Before proceeding for PowerDNS configuration, you must have installed PDNS on your 2 nameserver VMs.
For PowerDNS installation, please refer this guide :
https://www.virtualizor.com/docs/admin/powerdns/
Add PowerDNS server in Virtualizor
To add the PDNS server in Virtualizor, navigate to "PowerDNS" > "Add DNS Server".

Name: Name of the PDNS Server
Description: Brief description of PDNS Server
IP Address: IP Address of PDNS Server.
SQL Port: Provide SQL Port by default its 3306
SQL Username: SQL Username to connect as
SQL Password: Provide SQL Password
Encrypt SQL Password: If checked then SQL password will be stored in Encrypted format
SQL Database: SQL Database for PDNS
Use SSL: If checked SSL will be used for connecting to the PDNS server
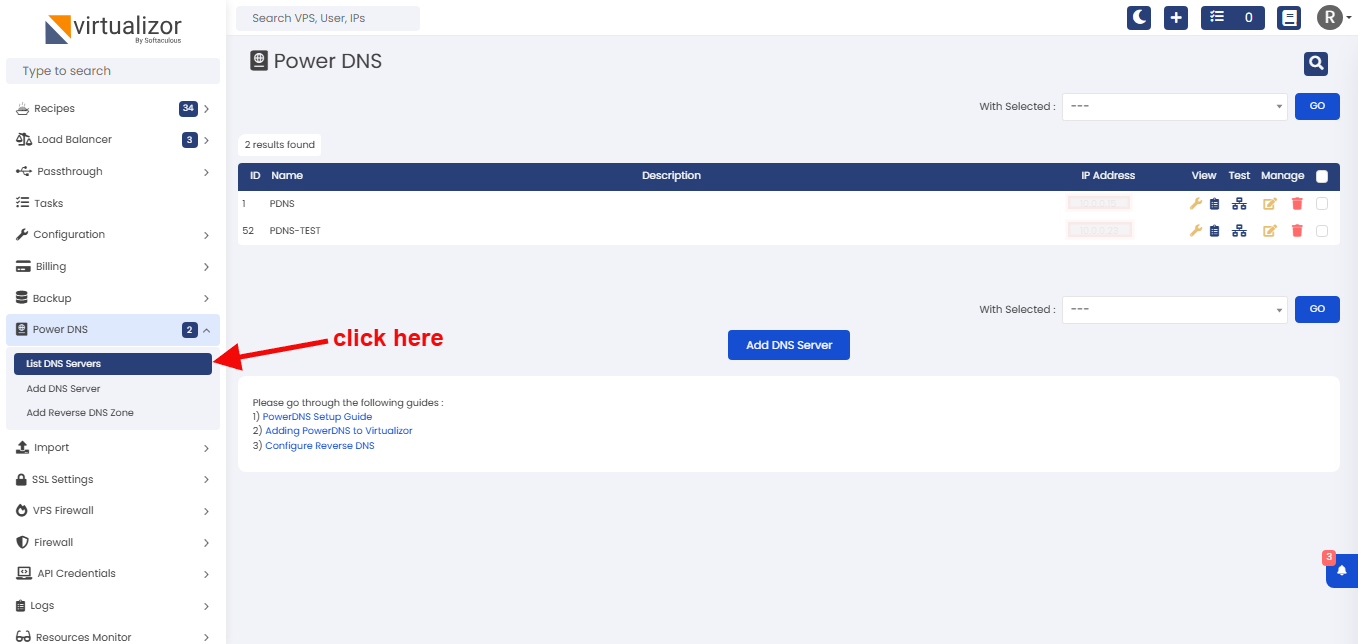
- After adding the PDNS server, you can see your server in "List PDNS Server" page.

DNS Zone / Records
Step 1 (Add PowerDNS Plan)
After adding the PowerDNS server, you need to add the Plan which you can assign it to users.
To add the PDNS plan, navigate to "Plans" > "Add DNS plan".
(You will find your added powerDNS server in the dropdown)

- The PowerDNS plan you created can be seen in "List DNS plan" page.

Step 2 (Assign PDNS plan to the user)
Once you are done with creating plan, you need to assign that plan to user so the user can add the domain records. Domain records can be added through the Virtualizor Enduser Panel.
- To assign PDNS plan to the user, navigate to "Users" > "Add User". You will see the option to assign the DNS plan you created in step 1.

Adding DNS From Enduser
After adding the DNS Plan to the user, Endusers can DNS Zone and DNS record from Enduser Panel.
To add DNS Zone navigate to Enduser Panel > DNS > Add Zone

To add records from Enduser panel navigate to DNS > List

Add the DNS record in Add Record page.

Host: Provide subdomain you want to map.
Type: Type of DNS record.
A -> Domain to ipv4
AAAA -> Domain to ipv6
CNAME -> Domain Domain
Content: Provide IP Address to associate with the DNS record
Priority: Priority of record
TTL : Time to live in the client cache
The added DNS record will list in Manage Zone page.

RDNS Zone / Records

Zone Name : The Zone name for the SOA Record.
For example,
IPv4 IP : 1.2.3.xxx, Zone Name : 3.2.1.in-addr.arpa
IPv4 IP sub-delegated network range : 1.2.3.168/29, Zone Name : 168/29.3.2.1.in-addr.arpa or 16-175.3.2.1.in-addr.arpa
IPv6 IP : 2001:41d0:0008:53ff:0000:0000:xxxx:xxxx, Zone Name : 0.0.0.0.0.0.0.0.f.f.3.5.8.0.0.0.0.d.1.4.1.0.0.2.ip6.arpa
Name Servers : The host name of the Name Servers that serve the given zone.
Hostmaster Email : The Email Address of the Domain admin.
Select Server : The PDNS server on which the zone is to be added.
Virtualizor since 3.0.6, support sub-delegated RDNZ zones (rfc2317).
If prefix of an IPv4 IP range is not /8, /16 or /24, then for that IP range, RDNS zone name can be in any one of following format:
- FIRST-LAST.REST_OCTETS.in-addr.arpa
- FIRST/PREFIX.REST_OCTETS.in-addr.arpa
Where FIRST and LAST are first and last possible value of the last
octet which satisfies the prefix, and REST_OCTETS is remaining octet in
reverse order.
Eg. If IP range is 192.168.15.16/28, then
FIRST = 16
LAST = 31
REST_OCTETS = 15.168.192
So rdns zone name in:
- Format 1: 16-31.15.168.192.in-addr.arpa
- Format 2: 16/28.15.168.192.in-addr.arpa
Note: Consult with IP provider to confirm which one of above sub-delegation RDNS format they support.
Adding PTR From Enduser
RDNS management option for Enduser panel can be controlled through following options
under Admin Panel > Configuration > Master Settings -> Enable RDNS
Enduser will be able to manage RDNS entries only if Auto Add rDNS Zone option is enabled .
If there is no zone present, then new zone entry will also get created for the PTR record added.
Enduser can also add PTR records from Enduser Panel only if Add PTR
records option is enabled under Admin Panel > Configuration >
Master Settings -> Add PTR records.
After adding the RDNS Zone from the Admin Panel, Endusers can add PTR records for their IP address from Enduser Panel. If you need any further information, please contact Virtualizor Support.

After adding records in enduser panel you can view the records in rDNS Records page.

Adding PTR Record
You can add PTR record from Virtualizor Admin Panel.
Navigate to Admin Panel > List DNS Servers > Records > Add Record

Select Record Type as RDNS, enter the IP and domain name.
After saving, the PTR record will appear on the DNS records page.

Support
If you face any difficulties regarding the PowerDNS configuration, you can contact us via support ticket or refer the PDNS guide : https://www.powerdns.com/documentation.html
