Overview
This article will explain you if you have server from Hetzner then how you can config the network related setting or IP Pools on the Virtualizor panel.
Hetzner Additional IPs
If you have additional IPs from the Hetzner. So please follow this steps to config or create ip pool on the virtualizor panel. Please go to Virtualizor Admin Panel -> IP Pool -> Create IP Pool and the following fields in the Create IP Pool form have to be filled as below:
- Gateway : Use Gateway same as provided by Hetzner.
- Netmask : Use netmask of the IP same as provided by Hetzner.
- Routed : Please check on 'Use routed network' option.
- Adding ip : Add ips along with Mac generated from Hetzner panel.
OpenVZ containers do not require mac for the ips.
Using Multiple IPs in a vps will not be possible since Hetzner does not provides option to generate same MAC for multiple IPs.
Having same MAC generated would be required since Virtualizor will add the IPs as alias on eth0 within vps.

Hetzner Subnet/IP Range
Temporary route
If you have purchased subnet, then first try adding an ip as alias on main server viifbr0:0 (or your custom bridge) and then check if that ip works from outside.
If bridge is not already created then please use this guide :
https://www.virtualizor.com/docs/admin/kvm-bridge/#making-the-bridge-permanent
Run following command to setup alias ip:
Check login works with server Password?
If login works with server password then looks like it needs extra routing on server to make it work in vps.
Down the alias ip carefully which was added on server using the below guide:
Once the VPS network starts working , also update the routing entries in the corresponding bridge config file so that it gets added automatically on reboot.
You can also use the following section to do that.
Permanent route
1.) Almalinux OS:
To add a permanent route to the Network Manager, you have to navigate to the connection file located at “/etc/NetworkManager/system-connections”.
Edit your Bridge config file (example viifbr0.connection) and add a “route1” property in the IPv4 part of the network configuration.
Example file contents for IPV4:
2.) Ubuntu OS:
Netplan is an Ubuntu exclusive, but it can be quite useful if you want to configure your network using a simple YAML file.
To add a permanent route using Netplan, add the following section to your “/etc/netplan” configuration file.
Example file contents for IPV4: /etc/netplan/<configuration_file>.yaml
- on-link: true
to: 0.0.0.0/0
via: 192.168.178.1
#following is the additional subnet route via server's IP
- to: 10.0.3.0/24
via: 192.168.178.1
For the changes to be applied, you will have to execute the “netplan” command with the “apply” argument.
Once done, add the IP pool with gateway as the server's IP.
Old method
If the above config does not help then please follow these steps to config or create ip pool on the Virtualizor panel.
Please go to Virtualizor Admin Panel -> IP Pool -> Create IP Pool and the following fields in the Create IP Pool form have to be filled as below:
- Gateway : This will be first Ip of the usable range assigned to you.
You cannot use that gateway ip in vps.
- Netmask : Use the same as provided by Hetzner.
- NAT: Please check on Enable NAT option .
- Adding ip : Please add ip range to the pool .

Since NAT Pool is not supported in case of Proxmox , you will need to create NAT Bridge manually on it. You can follow the below steps for the same :
Modify the file : /etc/network/interfaces and create bridge (Eg : vmbr0) manually and assign it the Subnet that has been allocated by the data center.
In the below example , Server IP is 192.168.1.10 and the Subnets allocated by data center are 192.168.24.48/28 and 192.168.25.48/28
We are almost setup now. Just make sure everything is correct before you restart the network. After that restart the network :
Once bridge is created and you're able to ping it , you can create IP Pool on Virtualizor panel with the below network settings :
- Gateway : IP of the Subnet / Bridge created earlier in the above step.
- Netmask : Should be given by the data center.
- Vlan : Please check on Enable VLAN option.
- Bridge name : The name of the bridge you've created above. Example : vmbr0
Single IPs cannot be added to Nat IP pool. Only a range of IPs can be added while creating the Pool.
The list of usable IPs are provided by Hetzner.
NAT Pool option on panel is not supported for Proxmox servers.
A Nat bridge is created after NAT ip pool is added from panel.
Its config file will reside under /etc/libvirt/qemu/networks/ directory
If NAT bridge is not started and its giving these errors on panel while starting vps :
error: Failed to create domain from /etc/libvirt/qemu/v1001.xml
error: Requested operation is not valid: network 'natbr1' is not active
Then you can try starting the bridge :
Once its started you can set it to auto start :
If net-start command fails with this error :
setlocale: No such file or directory
error: Failed to start network natbr1
error: The name org.fedoraproject.FirewallD1 was not provided by any .service files
Then you will need to start firewalld service as well :
And also add our ports to avoid issues :
firewall-cmd --zone=public --permanent --add-port=5900-6000/tcp (vnc ports can go higher than 6000 ranges as well)
firewall-cmd --reload
After starting firewalld, you can try to start NAT bridge again.
If NAT bridge is not started and it's giving these errors :
For ubuntu 22.04 and above
error: Failed to start network natbr0
error: Cannot check dnsmasq binary /usr/sbin/dnsmasq: No such file or directory
You can install the package "dnsmasq-base" on server.
If the outgoing ip for vps is not shown as expected and it shows as server's ip then you will need to add a firewall in iptables :
-P PREROUTING ACCEPT
-P INPUT ACCEPT
-P OUTPUT ACCEPT
-P POSTROUTING ACCEPT
-A POSTROUTING -s My-IP/27 -o Bridge-name -j MASQUERADE //This one needs to be removed
root@host~ # iptables -t nat -D POSTROUTING -s My-IP/27 -o Bridge-name -j MASQUERADE
Where, PUBLIC_IF is the NAT bridge name listed in virsh net-list command.
Also comment any un-wanted NAT rule added for viifbr0 in /etc/sysconfig/iptables file and then service iptables restart
Hetzner IPv6
Add IPv6 Address
Before adding IP Pool for IPv6 please make sure you have already configure the ipv6 address on your Host Server with bridge viifbr0.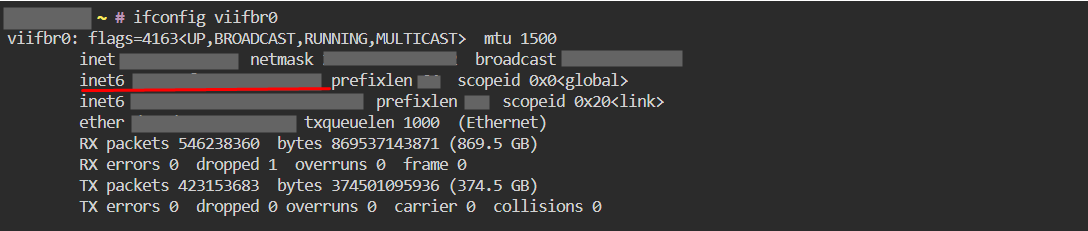
Now please go to Virtualizor Admin Panel -> IP Pool -> Create IP Pool and the following fields in the Create IP Pool form have to be filled as below:
- Gateway : Use the IP which was configured for the server.
- Netmask : Use netmask of the IP same as provided by Hetzner.
- Routed : Please check on 'Use routed network' option.
- Generate IPv6 : Please enter each octect of your ipv6 to generate the ipv6 address.

Add IPv6 Subnets
To generate or in order to create IPv6 Subnets you need to have an IPv6 IP Pool.
Now that you have an IPv6 IP Pool, Which we have created in previous steps now we can generate the subnets.
To do so go to Virtualizor Admin Panel -> IP Pool -> Add IPv6 Subnets. Fill in the details accordingly and the following is a screenshot of the wizard :
