Overview
Softaculous Virtualizor has an Inbuilt Billing Panel which is specific to sell VMs online thereby enhancing the User Experience considerably.
Virtualizor Cloud Billing System supports Hourly Billing.
This guide will show you how to create plans and setup the pricing as well as resource pricing for custom resource utilization.
Enable Billing System
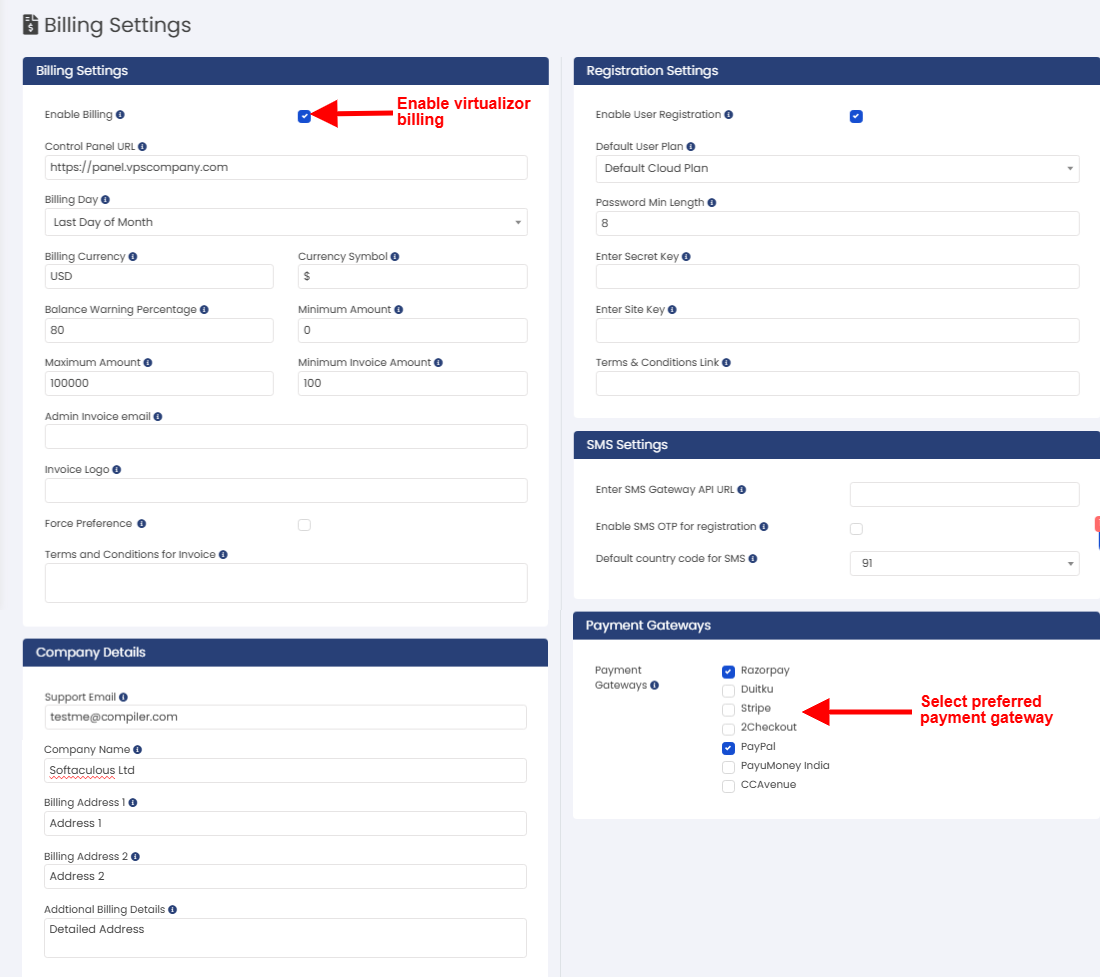
You will need to enable the Virtualizor Cloud Billing System from the Virtualizor Admin Panel.
Please go to Virtualizor Admin Panel -> Billing -> Billing Settings.
The following is a screenshot of the same :

Please do Enable Registration so that new users can register.
Payment Gateways
We provide multiple payment gateway option which you can enable.

You will need to enable the gateway which you want to provide to your cloud user and click on "Save Settings".
Once the gateways are enabled you will get fields for the enabled gateway, fill those fields with correct values and click on "Save Settings".
Steps for PayPAl:
1. Get a business account on PayPal.
2. Enable API access for your account.
3. Activate IPN at: PayPal IPN LINK
4. Copy the key details from the popup.
You can also integrate your own custom payment gateway.
To do so please go through the following guide : Integrate Payment Gateway
Create Cloud User Plans
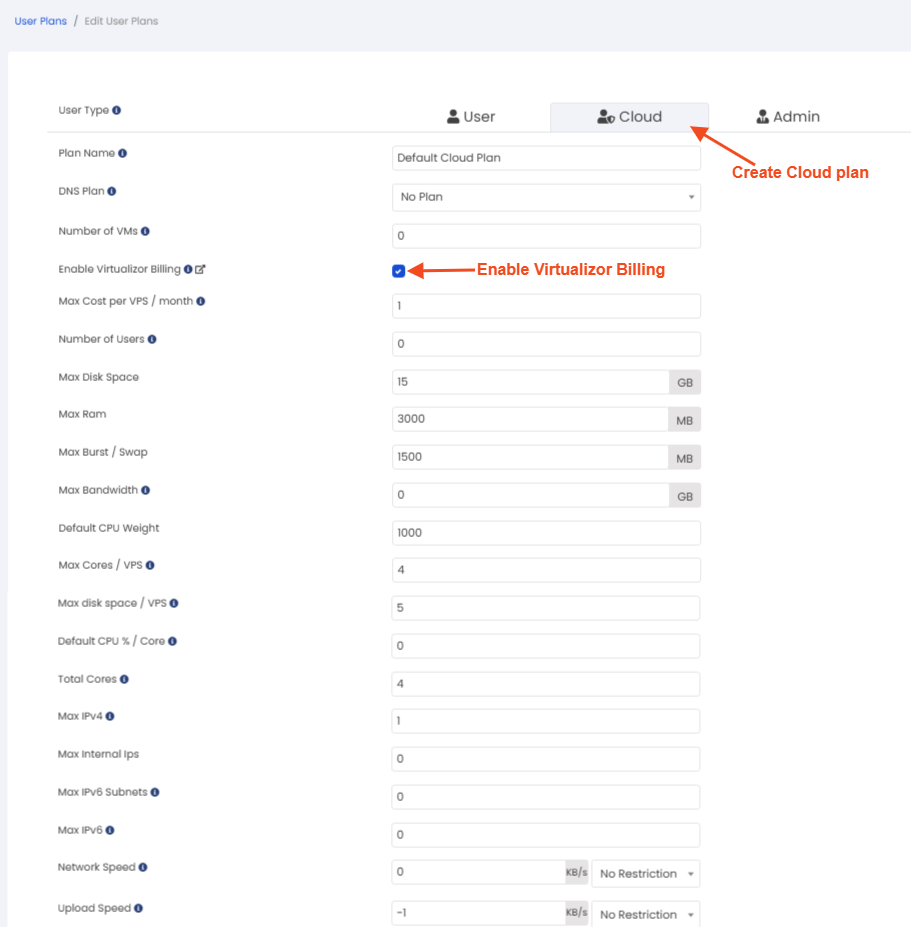
Firstly you will need to create at least 1 Cloud user plan which will have the option Enable Virtualizor Billing enabled for that plan.
To do so please login into the Virtualizor Admin Panel and go to Plans -> Add User Plan.
The Following is the screenshot of the Add User Plan wizard :

Create or Edit VPS Plans with Pricing
Now that the Billing System is enabled and users can register to create VPS, we need to create VPS Plans.
You can edit existing VPS plans if any or create new ones.
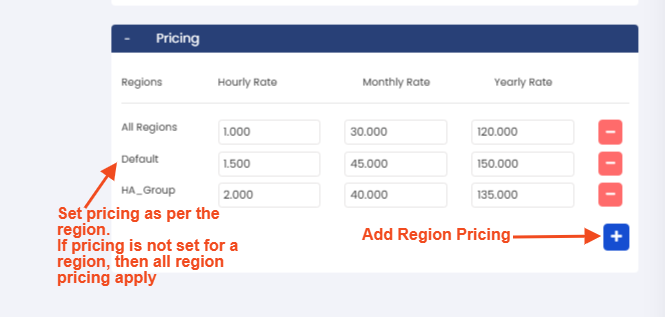
Virtualizor's Billing system enables you to setup pricing as per various regions or you can set the pricing for all regions.
You can set the pricing for All Regions and also set a different pricing for a particular region.
e.g. The pricing for a particular region where you have servers (lets say Mumbai, India) may be higher due to bandwidth costs being more.
In this case you can set the pricing for that region to be higher.
For all other regions the All Regions pricing will apply.
Go to Virtualizor Admin Panel -> Plans -> Edit Plan -> go to Pricing Section and set pricing as per the region.
Following is a screenshot of the Edit VPS Plan wizard with pricing settings :

Set Resource Pricing
There is one last thing we need to do now, set Resource Pricing.
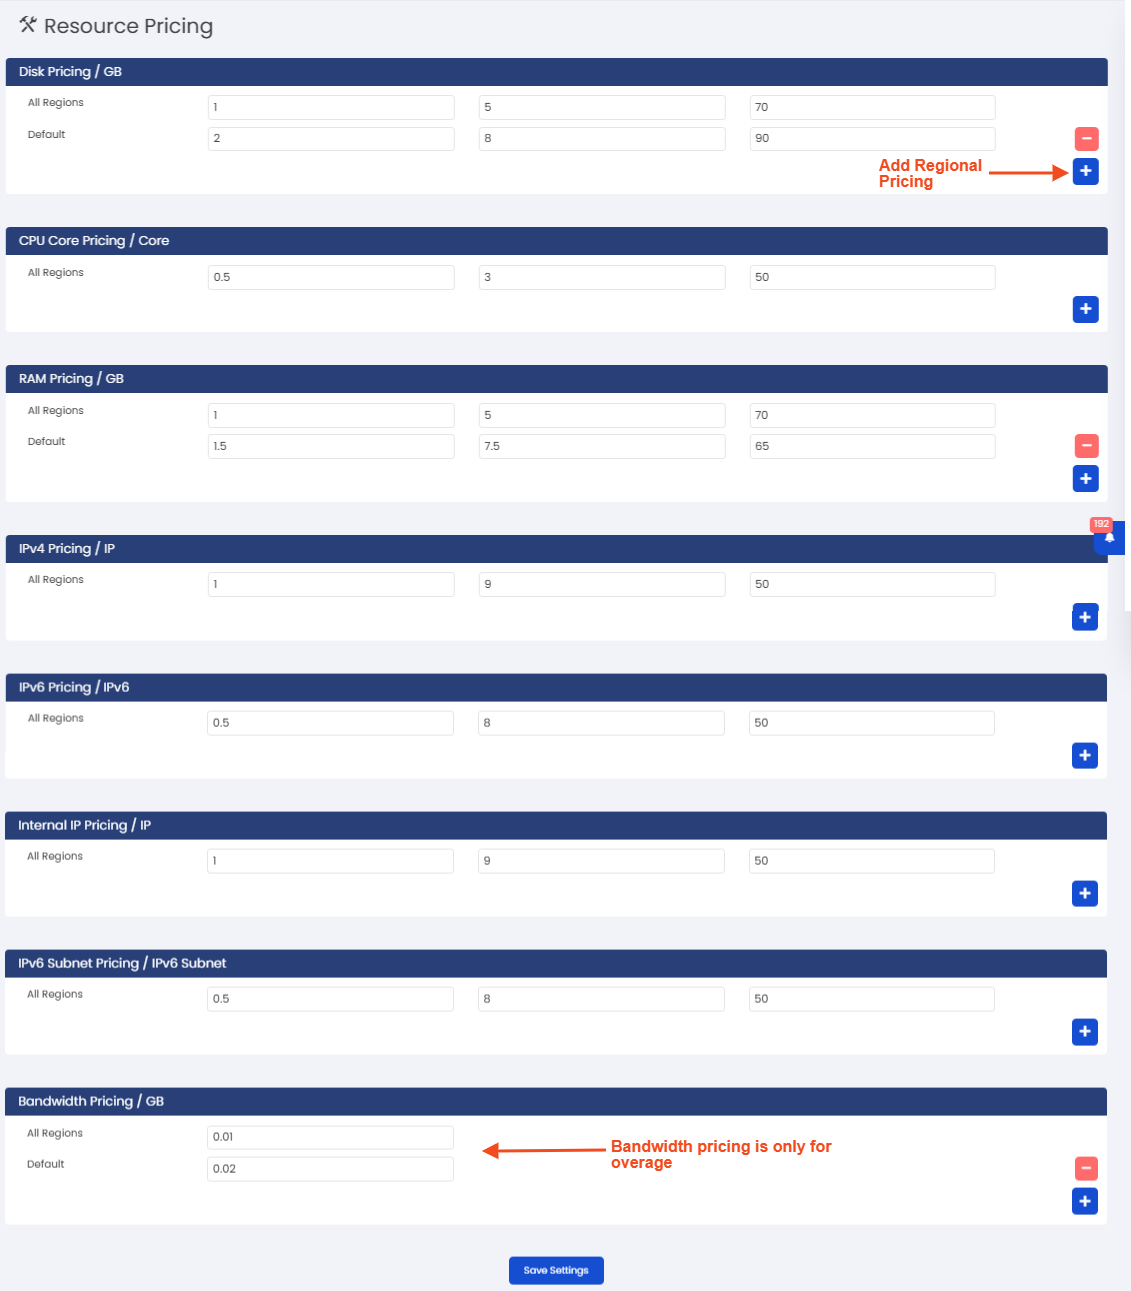
Virtualizor Cloud Billing System allows setting pricing for various resources which users can add on top of their existing plans.
e.g. If a user wants more disk space, he can buy that and will be billed for that.
Pricing can be set for all regions and / or for a particular region.
However, the All Regions pricing is compulsory and also the hourly rate is compulsory for resource pricing to enable the same.
For bandwidth there is only an overage rate.
Go to Virtualizor Admin Panel -> Billing -> Resource Pricing
Following is a screenshot of the Resource Pricing wizard :

Types of Pricing
Virtualizor Cloud Billing System has: Hourly, Monthly and Yearly Rate.
At the moment yearly rate is not working and will become functional in the upcoming version as its a Prepaid billing rate.
Hourly and Monthly Rates are for Postpaid billing only.
If Hourly rate is set, usage will be calculated hourly.
At the same time, if the monthly rate is set and if the amount calculated as per the hourly rate becomes greater than the monthly rate in the ongoing billing cycle, the monthly rate will apply.
Auto register using WHMCS details
If you want the user to use the same Login details which were used while registering the for cloud account on WHMCS, you will need to enable the callback setting from :
Virtualizor Admin Panel -> Master Setting -> Callback Settings section -> Enable login for WHMCS User
Invoicing
There are two option for creating/managing invoices for your users VM(s) usage.
- Virtualizor in-built Cloud billing Module
You can use our in-built billing module and manage invoices from Virtualizor cloud panel. - Enable callback setting to create invoices in your WHMCS !
If you want to use your WHMCS setup to manage the invoicing and payment, you can do this by enabling callback setting.
You can enable this callback setting from Admin panel -> Master setting -> Callback Setting -> Enable WHMCS Invoicing
Troubleshooting
1) If you receive error upon adding funds or re-direction after payment fails then make sure the 'Control Panel URL' in Configuration->Billing settings is correct and loading properly.
2) To simulate billing for cloud user, you can add funds
Support
Your Cloud Billing system is all setup now and you should create more plans as per your requirements. If you need any help, please contact Virtualizor Support and we will help you.
